![]()
![]()
Questions? Call Us 1–773–271–0318 9am to 2pm Central Time Mon.–Fri.
![]()
the Student Interactive Alexander Arrangement of Elements
Packaged in dozens, for student data entry, take–apart, assembly, and for keeping.
Also available in a class size package of thirty–six, with a bonus of a pair of DeskToppers.
![]()
Order the
Student Interactive
FEATURE MENU
The Lesson Before
THE Lesson
...when the Alexander Arrangement best provides clarity and appreciation of the standard table
Inventing
3D Periodic Tables
...from de Chancourtois and Mendeleev to the 20th Century interpreters
How Boys Learn
– and Don't
...action is the answer – don't make me sit here, let me do something!
Lesson Plan –
Scaffolding
...using prior knowledge, piqueing interest, motivating – "...involve me and I'll understand."
Lesson Plan –
Inquiry Based
...using prior knowledge, piqueing interest, motivating – "...involve me and I'll understand."
Back
Next
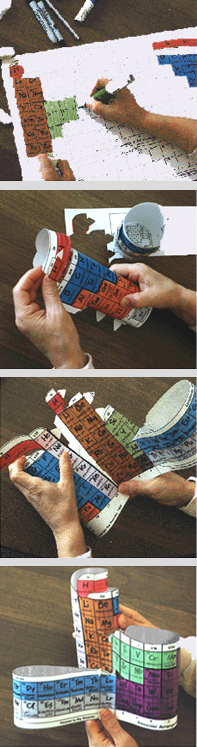
Below are color photos of the process which includes the coloring, data entry, assembling, and a typical final product.
The Student Interactive version of the AAE is especially useful as a hands–on project in the session (or sessions) just prior to the point in your curriculum where normally the periodic table is introduced.
Each set consists of a package of a dozen hands–on periodic charts (with atomic numbers only) printed in black on white 11"x 17" index stock, die–cut for separation and assembly into 3D models. The surface will accept a variety of media. The construction of the three–dimensional chart has been made relatively easy by careful design of the slots and tabs, by die–cutting all that needs cutting, and providing instructions that are carefully tested and illustrated.
Each chart carries only the element’s atomic number in each of the boxes, entry of color and other data to illustrate groupings is part of the participation activity of the student(s)s can be an individual or team effort, and adds kinetic learning to the abstract.
Markers are desirable, but not required, and while a ball–point pen is sufficient to the task, students can get creative as they want, using varied materials and cutouts from magazines glued to the boxes, limited only by the size of the element boxes.
While most class time will be spent in the entry portion of the lesson(s), students learn of the block's borders by scoring at their ends, holding them in their hands, and doing the connections while building a periodic table of their very own. At the same time, as they see the flat table returning to the three dimensions envisaged by the developer of the first periodic table, de Chancourtois, and recognize – as did Mendeleev – that the flat table is a far more convenient form, and that the gaps and jumps are necessary to keep it flat and convenient to carry and to put in books.
Below are illustrations of steps in the process of
correcting the 2–D periodic table by returning it to 3D
in a modern version of the original Periodic Table
(photos at the right)
Element Groups
While learning about the element groups, note that, on the printed and die–cut Alexander Arrangement of Elements (AAE), the European numerals (Roman) are above each column, and the IUPAC group numbers (Arabic) are below.
While learning about property groups, put a bit of color or the initial of the group (AM, AEM, C, PN, C, H, N – or whatever) in the top center of each element box – or color the whole box with a pale color.
(If the AAE project is going to take several classes, handle the sheet carefully to prevent premature separation, or detour to Disconnecting now, and work on the parts rather than the full sheet. The main section can be folded forward at 12/13 for convenience, but only fold the f–block arrow tabs – and leave the joiners in the sheet to keep from losing them.)
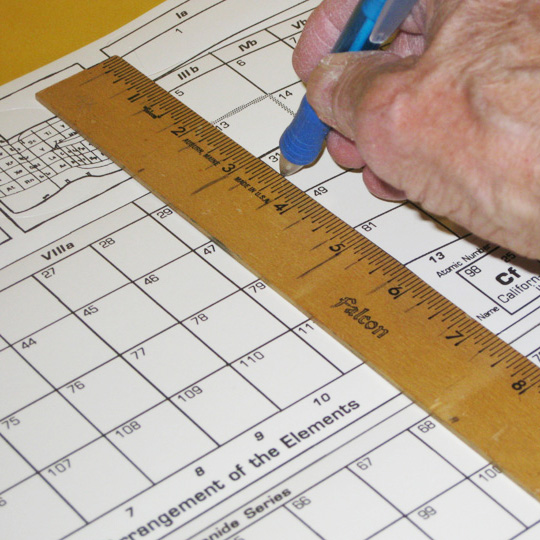
Element Blocks
Learning about the blocks begins by defining them on the flat chart by making scores for bending the paper between blocks. (Place the sheet on a surface where a ball–point pen can make an impression to do this.)
[image 1.]
These vertical scores will be:
• through the slots by group 1, border of s– and p–block,
• at the base of the arrow tabs by group 18, border of p– and s–block,
• between groups 2 & 3, below element 21, border of s– and d–block,
• between groups 2 & 3, down to element 21, border of s– and p–block,
• between groups 12 & 13, below element 13, border of d– and p–block,
• and the f–block, a separate piece, is self evident, needing no scores.
Elements
While studying each element, add bold element letter symbols when done.
Leave room for element atomic weights and names if they are to be part of the AAE lesson – then add these as you learn them.
When the learning about the elements is complete, so is the foundation for the study of chemistry!
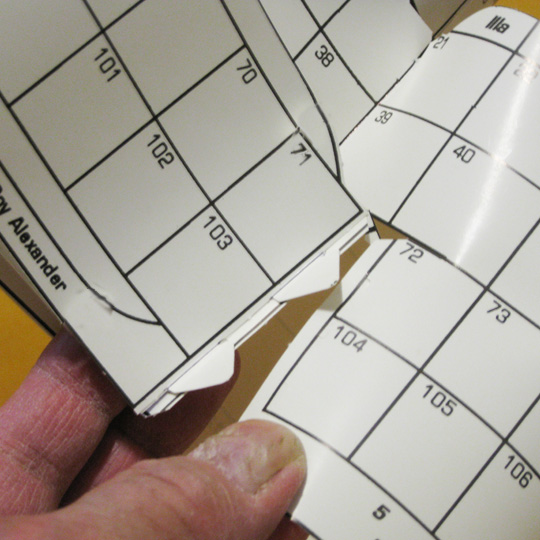
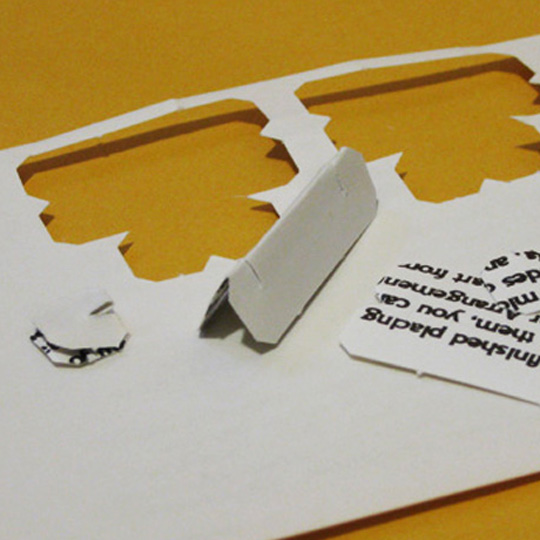
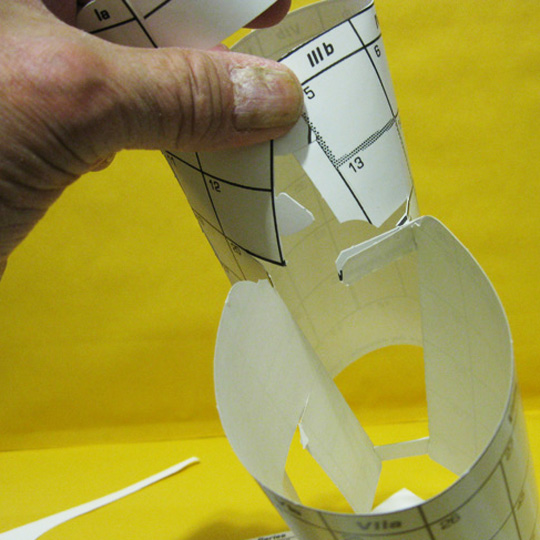
Disconnecting
Turn the sheet over to see the cut lines better. Now take the sheet apart carefully – the main section with the s–, p–, and d–blocks, and the separate f–block. Ignore the circular cuts near the top.
Remove the small joiners – for connecting opposite facing sides of the chart – from the bottom left (from the back) corner. The longer are bridge joiners and the shorter are pinch joiners, and probably stick together. Separate them and twist to free their short attachment cuts (which will slip into cuts in the chart where noted below). The model can be put together without the tabs, but they can be added during or after assembly for convenience and/or appearance.
[image 2.]
The Goal
Use the illustrations at the top for a guide to what’s supposed to happen and/or see the entire process and illustrations at www.allperiodictables.com/student.
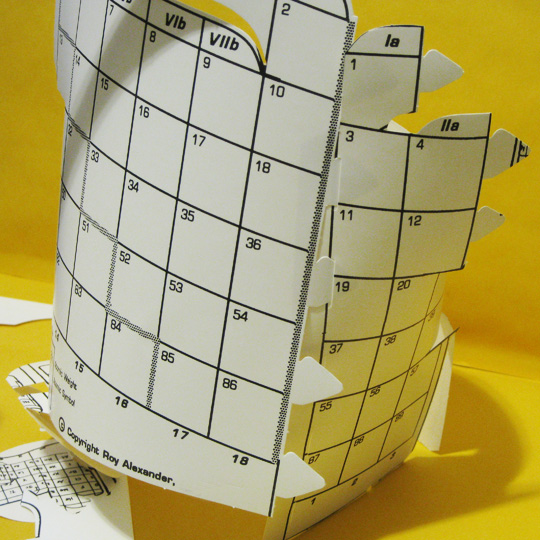
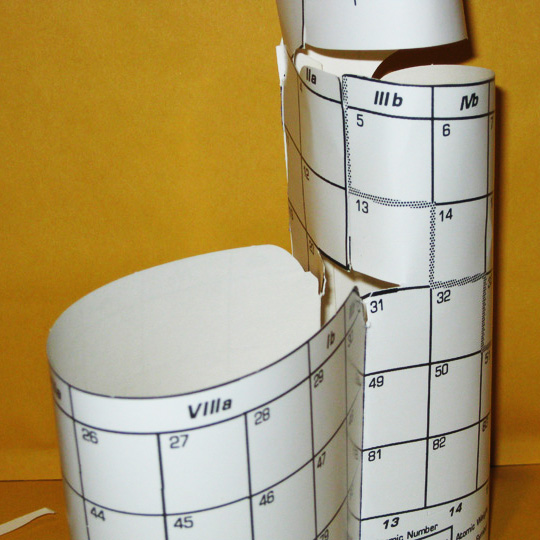
Reconnection #1
The first connection solves many of the flat table problems, as it joins most of the ends to the beginning of the next periods, placing most element atomic numbers in order.
Poke the 5 arrow–shaped tabs at group 18 into the 5 slots at the flap by group 1, and position line up the element boxes. Line it up neatly and Scotch Tape the tabs and flap to the material behind them – an activity for every subsequent joining.
[image 3.]
The cylinder created is a modern form of the 1862 – first – modern periodic table, by de Chancourtois, which was also a spiral on a tube.
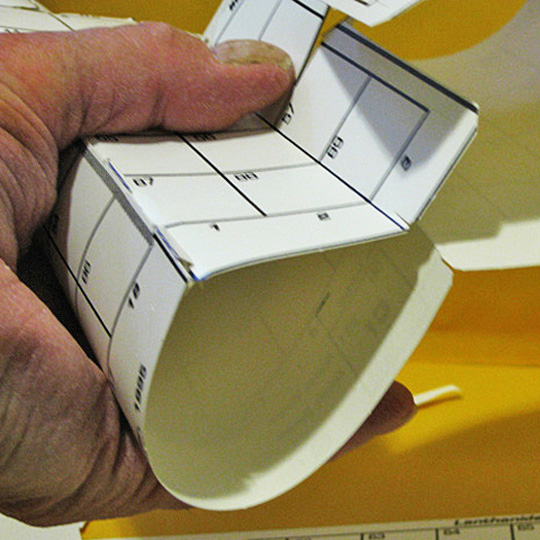
Giving the Bends
Putting an outside bend between the s– and p–blocks (above the d–block) and inside bends on both sides of the d–block will help in the next step.
[image 4.]
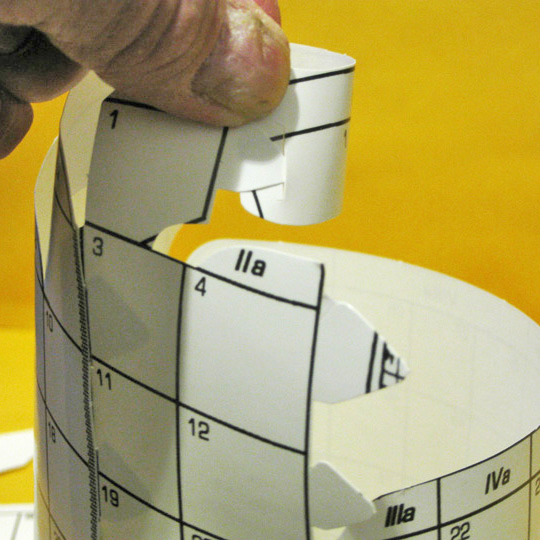
Reconnection #2
The second connection solves a problem scientists have been having, called; “Where the H does Hydrogen go?“ On the AAE, an extended H box connects periods 1 & 2, joins H with both Li and He, and has corner contact with F and Ne as well.
Loop the H (1) strip around from He (2) and slip the slot over the H (1) tab over LI (3).
[image 5.]
Line them up neatly and tape.
Reconnection #3
The third connection is insertion of the tabs by 4 & 12 into the slots by 5 & 13. Mounting the bridge joiner to gather the bottom of groups 2 & 3 and 12 & 13 might work well here, as the d–block might try to pull it apart.
[image 6.]
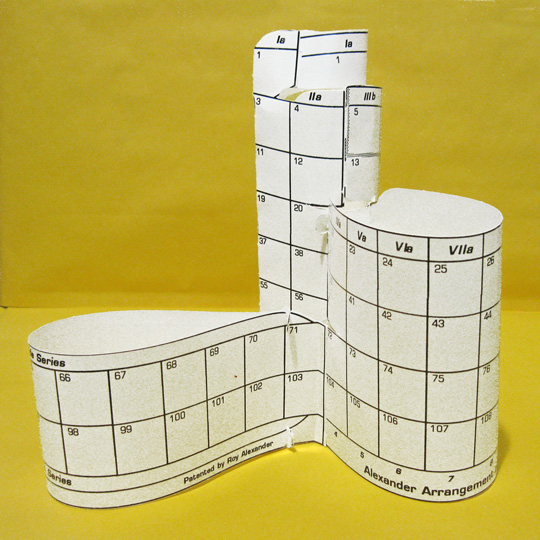
This completes the closing of the familiar gap in the middle of the flat periodic table, scores defining the block borders.
[image 7.]
Reconnection #4
While developing the trans–uranium elements during WWII, Glenn Seaborg established a spot for two groups of them outside the main table to keep it from getting too wide for convenience. Our fourth connection was approved by him, and brings the f–block back home.
Loop the f–block end with ends back to back and insert end arrow tabs into the slots in the flaps
[image 8.]
of the d–block on both sides of the line between groups 3 & 4. Tape or the small joiners might help here, inserting from the top at the atomic numbers 59 & 71, and the other from the bottom, directly underneath. Then poke two arrow tabs into the slot by 57/90 and two by 72/103. Align each side of the f–block up with the lines on the d–block and tape down the tabs and flaps.
The End
...of the breaking of the Periodic Law by the Periodic Table.
 an Alexander Arrangement of Elements
The Student Interactive photos on this page, for clarity, do not include the coloring and data entry performed by students prior to the assembly.
1. Element Blocks
SCORE FOR BENDS
2. Disconnecting
TAKING APART
3. Reconnection #1
PUTTING TOGETHER
4. Giving the Bends
DEFINE BLOCKS
5. Reconnection #2
THE HYDROGEN CROWN
6. Reconnection #3
CLOSE THE MIDDLE GAP
7. Looks Like This
BEFORE THE F–BLOCK
8. Reconnection #4
THE RARE EARTHS ARE BACK